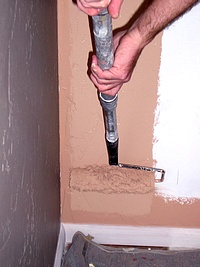
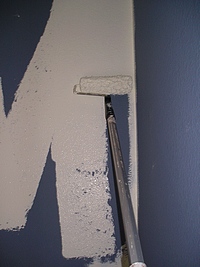
When you think about painting walls you probably imagine brushing and rolling the finish. This is the most popular method and makes a great do-it-yourself project for every homeowner. To get the wall painting done quickly and still maintain a great look follow these recommendations.
Choose Your Painting Tools
A good professional roller set-up and a couple of canvas will make painting walls faster and easier plus this equipment will last a very long time allowing you to paint more than one room.
The best tools for painting walls are a 9-inch roller with and a 3-inch paint brush, angle or flat which ever is easier for you to use.
For smooth walls use a 1/2 inch nap or thinner and for a textured wall use a 3/4 inch nap roller cover. A lamb’s wool paint roller cover is the best and will provide a great finish, far superior to cheap synthetic roller covers.
Other Tools and Painting Sundries that are Useful
- with 12 inch paper, wide masking tape and light weight plastic for covering up.
- 5 way or 11-in-one multipurpose painters tool. Great for everything from opening paint cans to cleaning the roller.
- A small assortment of drywall tools and putty knifes for any patching or drywall repair.
Preparation before Wall Painting
Painting walls requires all repairs to be done first. Proper interior surface preparation can be simple, filling a few nail holes, or as complex repairing and patching holes. Be very thorough with the preparation, the paint will highlight all defects.
Before beginning to paint remove the outlet covers and switch plates. Use 2-inch masking tape to protect the base from roller drips and cover the tops of windows with masking paper. Regular masking tape will work fine if it is removed within 3-4 hours, if not use .
Protecting the light switch and outlets isn’t necessary if paint is brushed around these areas before rolling. For extra protection use a strip of tape over the outlets and switches. Cover any furniture that is within 3-4 feet of the work area with light weight plastic.
Now remove any unwanted wall hangers and fill small holes with light weight spackle. Small cracks on the walls surface can be filled with the same spackle but cracked corners will need to be caulked.
Painting walls without a primer is fine as long as the same type of paint is used, example latex over latex, but if the wall was previously painted with an oil base paint and you intend to use a latex paint then the entire wall must be primed.
A good painting rule to follow is “oil over water never water over oil”. In other words, never apply water based paint over an oil based paint without priming first. An oil based paint can be applied over water based paint without priming.
Priming is necessary for all major repairs and for sealing stains. A stain blocking primer can be used for both areas. Some stains can be difficult to seal with acrylic primers, use the oil base or shellac stain blocking primer if the stain keeps coming back.
Brushing – aka Cutting In
Beginning a wall painting project always starts with some brushing. Using a 3-inch brush apply the paint to the corners, walls to the ceiling and the walls to the trim, leaving a 3-4 inch band of paint.
Now is the best time to cut-in around any obstructions such as electrical switches, outlets and permanently attached fixtures. Be careful brushing around the outlets, no need for excessive paint and possible drips from these areas.
Using a brush requires practice and patience. Use light pressure and a pulling motion to find the leading tip of the brush. Too much pressure will cause the brush to fan out. With practice this will become easier.


Rolling a Wall
Prior to starting any wall painting double check the masking on the base and coverage of the drop cloths on the floor. Always keep the 5-gallon bucket with roller screen in front of you.
Load the roller by dipping it into the paint. Do this a few times at first and remove the excess by lightly raking the roller across the screen. Do not totally submerge the roller into the paint. This will produce drips from the ends of the paint roller.
A clean, unused, roller will require extra dips and raking across the screen before it is properly loaded.


Use a slow upward stroke, start applying the paint near a corner and in the middle of the wall. Light pressure on the roller is all that is needed. Too much pressure will produce splatters and deposit too much paint in one area. Rolling to fast will throw paint all over the place.
While painting walls use a straight-line pattern when unloading your roller. Avoid rolling the paint to thin. Over lap each new stroke 3-4 inches, as the paint spreads out reduce the pressure. Continue this pattern for 3-4 feet then lightly load the roller and re-roll in a vertical pattern to remove any thick areas or thick edges left by the roller.


 Smooth or lightly textured walls need a finish stroke in the downward direction. This will produce a consistent roller stipple in the same direction.
Painting walls with heavy textures requires a tight “V” or “W” pattern. Apply the pattern to a 3×4 foot section. Reload the roller and fill-in the pattern. Work sections of the wall from top to bottom. Finish the painted area with a full vertical pattern to even out the paint.
The most important considerations when painting walls is applying too much paint in one area or not enough paint. You will recognize the distinct look of very heavy paint. Re-roll these areas with a dry roller while the paint is still wet. Using a final vertical pattern from the ceiling to the floor will spread out any heavily deposited paint.
If rolled to thin a second coat will be necessary in order to achieve the desired look.


