 Painting an acoustical ceiling can have a dramatic affect on a room’s appearance, especially if the ceiling has never been painted. It is a great trick to brighten up a room with this type of ceiling.
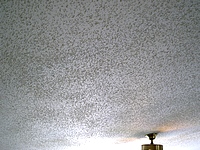
This ceiling texture has a very rough appearance that looks like popcorn. Often referred to as a popcorn ceiling, they are everywhere. Unfortunately most people leave these alone thinking that painting an acoustical ceiling is too much work.
Common in homes built in the 1970’s and the early 1980’s, its primary goal was to save the builder money. With a popcorn ceiling the required drywall finish doesn’t need to be as smooth or level.
This is an easy interior painting project for the experienced do it yourself and good results are attainable by the novice painter. After painting the ceiling is the best time to paint the walls.
Preparation
When painting any ceiling there will be drips and splatters, but painting a popcorn ceiling will produce considerably more splatters and some debris raining down. The masking materials needed are masking tape, masking paper and lightweight plastic.
Remove as much furniture as possible and cover everything that remains. Painting this type of ceiling is easier if the room is empty. Cover the floors with drop cloths then any remaining furniture with light weight plastic. Plus, remove the light fixtures or wrap them completely with masking paper and tape.
You have two choices concerning paint masking, spraying or rolling. Both methods will need slightly different approaches. Spraying requires full tight masking, while the masking can be looser when rolling.
Another consideration is; Will the walls be painted after painting the acoustic ceiling?
- Painting the walls. – The amount of needed masking is reduced if the walls will be painted after the acoustical ceiling. Cover the windows and doors with plastic plus cover the base with masking tape to protect it from splatters. The masking is similar when painting walls.
- Not painting the walls. – You will need to do a lot more masking if the walls won’t be painted after the ceiling. The walls will need to be completely covered with lightweight plastic. Tack the appropriate width of plastic close to the acoustical ceiling and seal tightly to the ceiling with wide masking tape. Another method is to use a masking machine and masking paper over the plastic to create a seal at the ceiling.
 After all the masking and covering, perform any other needed acoustic ceiling repair. Small areas of the ceiling can be repaired with aerosol cans of acoustic texture. These products work very well for small areas, less than 16 × 16 inches.
For larger areas the use of a pneumatic hopper will be a better choice. Acoustic texture is available as a bagged powder.
Water stains must be sealed with Kilz, or a similar product. Apply 2 coats with an aerosol can to make sure the stain is fully sealed and will never return. Of course, make sure whatever caused the stain is fixed first.
Acoustical Ceiling Painting Methods
 If the acoustical ceilings in your home have never been painted you have two paint application options, using an airless sprayer and rolling.
The use of an airless sprayer is best for an acoustical ceiling. Rollers do work, but will remove some texture and are very messy. Plus rolling an acoustical ceiling is hard work.
An unpainted acoustical ceiling is very porous and will require a lot of paint to properly seal and provide an even appearance. The amount of effort you spend rolling your acoustic ceiling will convince you never to do it again. Rolling will be much easier if the ceilings have been previously painted.
Spraying
Using an airless sprayer isn’t very hard. On an acoustical ceiling any goof-ups are not likely to show. Two coats of paint will produce the best results. Thinning the paint is needed for the best spray pattern. Thinning will depend on brand and type of paint you use. Choosing a spray tip depends on the type of paint, amount of thinning and size of airless spray pump. A 415 or 515 will work great with properly thinned acrylic flat paint.
The biggest consideration is the spray pattern. It needs to be complete, without breaks, and flat. If an airless spray tip is round and has “fingers” at the edges it is worn out and needs to be replaced. Test on a piece of cardboard before continuing.
The smaller airless spray pumps are perfect for this project and the use of a pole gun will make everything easier. Pole guns are available in lengths from 16 inches to 6 feet. A telescopic spray pole can also be used.
Spraying an acoustical ceiling is straightforward. For the first coat begin spraying in one direction only. It doesn’t matter which direction you start with, but this pattern must be maintained throughout the first coat. The second coat is applied in the opposite direction. This is called double spraying. Allow the ceiling to dry for an hour or two between each coat of paint. This will produce an even color and sheen.
Rolling
Rolling a popcorn ceiling is absolutely possible. As compared to spraying this will be more labor intensive. This is a particularly messy job. Wear protective clothing, a cap or hat and safety glasses.
The choices of roller covers are lambs wool and specialty synthetic covers made for this purpose. I have tried a few types of synthetic covers on the market and experience has taught me that using a thick 1 inch high quality lambs wool cover works best.
Do not use a pan when rolling. Professional painters use a 5-gallon bucket with a roller screen. A professional roller set-up will hold more paint and make this work a little easier. Along with a bucket a good roller pole should be used. No reason to work any harder than necessary.
- The edges of the ceiling and around any installed objects will require cutting-in with a brush. I find it useful to use a large barrel shaped brush, 2-1/2—3 inch, and use a dabbing motion instead of the typical brush stroke.
- Painting a “popcorn” ceiling with a roller is uncomplicated. A straight rolling pattern is needed, not a “V” or “W”, same as all ceiling painting. The roller will unload its paint quickly; don’t be surprised if you can only roll 2 feet before reloading the roller cover.
- Use the lightest pressure necessary on the roller. If you push to hard the acoustic texture will be removed from the ceiling and rain down onto you and the floor.
- Begin rolling close to a corner and paint in sections. Work across the room trying not to over lap too much. On an acoustical ceiling over applying or working the paint can lift a lot of the texture off the surface.
- Roll as close to the edges as possible. If the walls will be painted go ahead and push the roller into the edges. Cut-in with a brush by using a light dabbing motion after each coat has been applied.
- Two coats, or even three, will be needed. This will depend on your chosen color and the condition of the acoustic ceiling.
- Each coat of paint will need to dry for a minimum of 3—4 hours before recoating. If the ceiling is too wet or the paint is still tacky and soft the application of another coat of paint could tear off the texture.
Choosing Your Ceiling Paint
 The quality of the paint you use will drastically affect the amount of paint needed and how hard you have to work getting it applied. By using a very good paint the number of coats will be decreased. One less coat of paint will save you money, time and effort.
A flat sheen looks best, but any paint sheen can be used. An acoustical ceiling cannot be washed like a wall. So there is no need to use a shiny paint. The only exception is if the ceiling is in a high humidity area. In this case a satin or semi-gloss sheen can be used.
Thinning the paint is very important.
Thick acrylic paint will be too sticky and literally pull the texture from the ceiling when rolling. Top quality acrylic paint can be thinned up to 20% without any problems. For this type of ceiling you can use water instead of special paint conditioners, the thinned paint needs to soak into the acoustic texture.
The addition of 1/2 quart per gallon will allow the paint to soak into the texture and will be less likely to rip it off the acoustical ceiling. Add 8 ounces first, 1/4 of a quart, then test by brushing, dabbing the paint on the acoustical ceiling. You want a thick stain like consistency, add more water if necessary.
For spraying add a half quart of water per gallon. This will produce a fine spray pattern and allow the paint to soak into the texture.
2 Responses
Never, ever, paint a popcorn ceiling if it has asbestos! Get the texture properly tested first!
Painting acoustic, spraying is best, is the only way to seal it or encapsulate the asbestos. Don’t scrap it off without testing.