You might have learned this the hard way: it doesn’t take much force to make a small hole in drywall. From nail and screw holes to doorknobs, small drywall holes are nearly unpreventable. But don’t worry; repairing a small drywall hole is a task any homeowner can complete quickly and successfully.
Three Common Methods to Repair a Small Sized Hole in Drywall
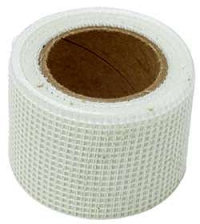
If your small drywall hole is very small, about 1/2″ or less in diameter (think nail hole) you can fill the hole with spackling paste. Small drywall holes approximately 1″ in size can be repaired with fiberglass mesh tape.
Holes larger than an 1 inch (think doorknobs) require a different drywall repair technique: a drywall patch.
Let’s break down each method. All the materials you’ll need to repair a small sized hole in drywall are found at your local hardware store, and are very inexpensive.
How to Repair a Small Drywall Hole: Spackling Method
- Prepare hole. Use a sharp utility knife to “clean up” the hole before taping- removing any stray paper.
Tip: If drywall paper is torn beyond the hole, score with a utility knife where the tear ends and remove paper. - Apply compound. Put a tablespoon sized amount of spackling paste on the putty knife. Run the knife flat across the small drywall hole. While spackling paste will start to fill the hole, some paste will end up on either side of the hole- and that’s okay, we’ll take care of that later.
- Finish hole. Using a damp (not wet) clean white rag, wipe the patched area in a circular motion until you’re satisfied that spackle has completely penetrated the small drywall hole. This step will also help smooth out the “edges” of the spackle. Let dry and repeat if necessary. Be absolutely sure that the small drywall repair area is completely dry before applying paint or drywall texture. If painting, the repair area should be so small that primer is not a necessity.
Tip: I recommend using a white rag, as a colored rag may bleed onto your repair area.
Tools and Materials to Repair a Small Drywall Hole: Spackling Method
- Spackling paste (light weight spackling paste is usually the best choice)
- Putty knife
- Utility knife
- Water
- Clean white rag
- Paint
How to Repair a Small Drywall Hole: Fiberglass Mesh Tape Method
- Apply tape to hole. Use a sharp utility knife to “clean up” the hole before taping- removing any stray paper. Measure and cut two pieces of self adhesive fiberglass mesh tape (often referred to simply as “Fiber Mesh Tape.”) Be sure tape is long enough to cover the hole and extend onto surrounding drywall by about one to two inches. Cover the small drywall hole by making an “X” with the tape. Use your finger to make a small depression in the tape where it covers the hole, and then secure edges of tape firmly to the drywall surrounding the hole.
Tip: Cut tape using a utility knife with a sharp, clean edge. - Apply compound and finish. Using a wide putty knife, fill the small drywall hole with drywall compound. Be sure to use thin coats of compound, and feather edges carefully beyond the tape. Let dry. Repeat until hole is filled. The compound will be slightly higher than the wall surrounding it. Sand with a sanding sponge until repair area blends seamlessly with surrounding wall. Be absolutely sure that the repair area is completely dry and free of dust before applying paint or drywall texture. If painting over your small drywall hole repair, take the time to prime the area for optimum results.
Tip: Consider using a fast-drying patching compound if time is critical.
Tools and Materials to Repair a Small Drywall Hole: Fiberglass Mesh Tape Method
- Fiberglass mesh tape (comes in rolls of various sizes)
- Utility knife with sharp blade
- Joint compound
- Wide putty knife
- Sanding sponge
- Clean rag
- Primer (if applicable)
- Paint (if applicable)
How to Repair a Small Drywall Hole: Patch Method
- Prepare patch. Cut the metal backer of your drywall patch to fit over the small drywall hole. Be sure that the sides of the metal extend slightly beyond the edge of the hole. Cut the mesh tape so that it extends over the metal piece by about 1″ on each side.
Tip: Drywall patches come in various sizes up to 8″×8″ square and can be found at any hardware store. - Prepare wall and patch. Using a utility knife, carefully score the wall around the patch and remove a layer of the paint and drywall paper. Once your patch and wall are ready, it’s time to make the repair. Adhere the metal patch to the wall, covering the small drywall hole, and apply tape.
Tip: Using a utility knife with a new blade will help create sharp scores, and make paint and paper removal easier and cleaner. - Finish hole. Apply joint compound with a 4″ putty knife, and cover area entirely. Use a thin coat, and feather the edges of the compound out about 2″ from the perimeter of the mesh patch. Let dry and use a sanding sponge to gently sand out rough spots if needed. Reapply compound as needed, let dry, and sand again. Often, it takes three coats to get a smooth finish. Take a step back and analyze the small drywall hole repair from various angles to look for high spots, or exposed tape. You may find that you’ll have to feather the compound beyond 2″ to get a smooth, seamless finish. Be absolutely sure that the repair area is completely dry and free of dust before applying paint or drywall texture. If painting, take the time to prime the area for optimum results.
Tip: Angle a light at the repaired area (a flashlight works great) to expose bumps or rough spots.
Tools and Materials to Repair a Small Drywall Hole: Patch Method
- Drywall patch
- Tin snips (cutting metal patch)
- Utility knife
- Joint compound
- 4″ Putty knife
- Sanding sponge
- Clean rag
- Primer (if applicable)
- Paint (if applicable)
As I promised, repairing small drywall holes is really a simple, fast, and inexpensive job. I’ll leave you with these two tips as you tackle your first small drywall hole repair job: Buy the appropriate tools, then clean and store them properly after each use. Do this and they’ll last you decades or longer. Materials such as spackling paste won’t last decades, but if stored properly (lid secure and placed in a moderate climate) you’ll definitely be able to get in a few uses (just be sure to stir the spackling paste well before use.)