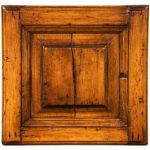
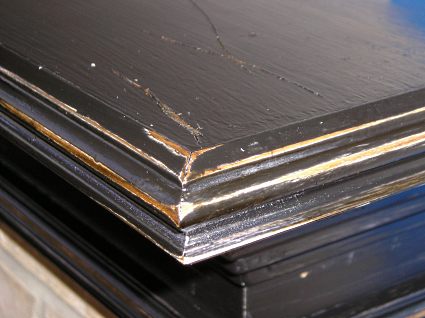
When thinking of kitchen cabinet overhauls, you may wish to go from modern to antique. An ageless look of old world charm can be created by simply distressing your kitchen cabinets. The process is not difficult, and the results can be quite beautiful.
Before beginning, ensure you’re working with decent quality cabinetry. Those $49 soft pine cabinets sold in outlet stores won’t hold up to this process. The strength and workmanship of your cabinets are important considerations here. It’s also vital to know the type of wood you’ll be working with. Regular (not soft) pine is softer, so it’s essential that it be subjected to less distress. Oak, cherry, walnut and other hardwoods can take more of a beating, which essentially is what the ‘distress’ process involves.
The process can be fun and a great stress releaser. You get to let out all your frustrations by beating on wood. Tools required are nothing out of the ordinary: Household tools, hammer, chisel, chain, (not used in every distress project) sandpaper, paint stripper, glaze (which is just thinned paint), varnish or other sealer.

The distress process can be done on painted cabinets or on raw wooden cabinets, because both will require further refinishing. Since hammered old world or antiqued cabinets require more work for completion compared to standard cabinets, normal pricing for distressed products is higher at stores or custom cabinet makers. Save the dollars and do it yourself. Keep in mind that your goal is cabinets that appear to have aged naturally over decades.
Start by removing all hardware from the cabinets, like handles. Then clean the cabinets with a damp cloth. There is no need for chemicals. Once your cabinets are clean and thoroughly dry, the process can begin.
Cabinets can remain hanging on the wall, but it may be more convenient to take them down for this. Not to worry if you’re not experienced at hanging cabinets. Leave them where they are if that’s the case, or you’ll just make more work for yourself. Taking doors off and removing drawers can make it easier to distress the cabinet faces and the doors and drawers.
The fun now begins! With hammer in hand, lightly hit the cabinet. Remember the key word is “lightly.” You don’t want to put a hole in your precious cabinet. Just bruise it. Many experienced craftsmen wrap a cloth around the head of their hammer. For those with a heavy hand, this technique will go a long way toward eliminating any possibility of damage.
Don’t overdo the hammered marks on the cabinet face, as you just want it to look worn and not wrecked. If you prefer to work with a thick chain or even chisel and notch out pieces, that works as well.
Cracks, gouges and worm holes can easily be faked.
- Cracks in Wood – There many ways to do this; take an awl or the sharp corner of a wood chisel and carve out a line of wood. Follow the wood grain for a realistic looking crack. Don’t take out too much wood; just enough for some stain or glaze to soak into for highlighting the crack, 1/8″ or less should do it.
- Gouges – Same basic idea as cracks except a gouge goes across the grain and isn’t as deep.
- Worm Holes – Once again the awl will be handy. Make groups of “holes” in various areas. Not too many.

Less is better when it comes to “distress” work. Never forget the goal of natural aging.
Now that your cabinet has been “abused,” it’s time to gently get it back into shape. Depending on the type of wood you’re working with, it’s always best to use a lower, or fine, sandpaper grade to start the refinishing process. As you sand, a picture of the “damage” you inflicted will be more clear. If you decide on further distress, this is the time to do so.
After the distressing and sanding are completed, it will be time to paint or stain. Local hardware stores have a huge variety of cabinet paint colors and stains, and even kits with two or three paint tones to add depth and color. Choose your paint or stain wisely, as this will give you the final product. Though not required, kitchen cabinets are best if paint is finished with a varnish or your preferred sealant.


