
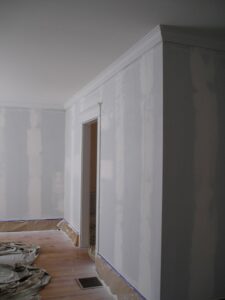
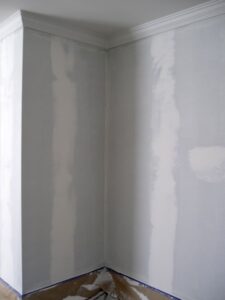
 If you’ve gone through the hassle of removing old wallpaper before painting, congratulations! The worst part is over. What do you do now? Thankfully painting after removing wallpaper involves just a few simple steps.
Remove any remaining glue
Wallpaper usually leaves some glue behind when it’s removed. Use TSP (trisodium phosphate) or a solution of vinegar and water to wash the walls. Scrub gently, and try not to get the wall too wet. TSP can be tough on your hands, so wear gloves when using this product.
Don’t worry about getting every last bit of glue off, but do try to remove all the backing paper if possible, because it will show through the paint. Rinse the walls with warm water and allow to dry completely.
Smooth the surface
If remaining wallpaper adhesive has made the wall feel rough, sand it lightly to knock down the texture and make it smooth again. If you weren’t able to get all the backing paper off when washing the walls, the sandpaper should do the trick now. Works on smooth walls only. Textured walls can be lightly sanded but be careful not to sand off any texture.
Prime
If all the glue has been removed and the surface is smooth, apply a coat of good latex primer. Two good brands are Gripper and Zissner 123. If glue remains, use Universal Oil Base (like Kilz) or a shellac primer, latex will soften and raise the remaining adhesive. Be especially careful to seal any remaining backing paper, or it might lift later, pulling the paint up with it. This is another good reason to remove all remaining backing paper before priming.
 Patch any damaged areas
It’s not uncommon for wallpaper removal to cause some damage to the wall beneath. Use joint compound and a wide putty knife or drywall knife to fill in any dings or gouges.
Do a skim coat over any remaining backing paper. This should keep the edges of the paper from showing through the final finish. Allow to dry, then sand smooth, feathering the edges.
Prime repaired areas
Seal repairs with latex primer and allow to dry. This will help hide the repairs after painting.
Paint
Paint, using your choice of roller. Patched areas sometimes appear as a dull spot; this is easily fixed with another coat of paint. Use high quality paint and good painting techniques and everything will be fine.
About the Author:
Crowder Painting is your go-to for interior and exterior painting in Colorado Springs. Experience our commitment to precision and quality.
12 Responses
Why “Patch Damaged Areas” after “Prime”ing? Then “Prime Repaired Areas”?
Why wouldn’t I “Remove Remaining Glue”, “Patch Damaged Areas”, “Smooth the Surface”, “Prime”, then “Paint”?
Not criticizing….seriously asking.
thanks
The idea is to seal up any remaining glue residue before the patching compound is applied and can react with it. If you have large areas of damage this can be a real pain. If cracking or peeling of the patching compound occurs now you know why.
What grit sandpaper do you use to sand the joint compound to make the walls smooth for priming and painting?
150 or finer will work well. Or use a medium/fine sanding sponge. For quick cutting use 100 or 120.
I’m removing wall paper from wall in old house. It is leaving large areas where not only the glue but the sheet rock paper behind it is getting pulled up. Even after sanding it lightly it is smooth but still shows where the paper is peeled up. It would take forever to plaster all the spots. I cant afford to sheetrock the room. Is there a primer that will smooth out the wall and prepare it for regular coat of paint?
Best to just paint over the wallpaper. Apply a oil based or shellac primer then apply drywall mud over the damaged areas and the seams. Sand then reprime before painting. There isn’t a texture primer that I’m aware of. You can apply your own wall texture over the primed and repaired wall; skip trowel is nice and easy to do or opt for a modern machine texture like knock-down.
Here’s some to try;
Brush Texture
Knockdown Texture or Orange Peel Texture
Skip Towel Texture
i removed strippable wallpaper which didn’t leave behind any residue & the drywall is smooth. is it necessary to apply primer, or could i just paint the walls? thanks.
No need to prime. Go a head and paint if there is no residue.
Can I use a ova solution to prime walls after removing the paper?
Kind regards
Sam
Don’t know what ova solution is. I need more information.
I removed wallpaper border using vinegar/water solution. Water that dripped down left streaks AFTEr I painted two coats. What to do?
The streaks can be sealed with an acrylic universal primer then touched-up. Zinsser 123, WaterBased Kilz or Gripper should do the trick. Maybe a spray can if just a few small areas. In most situations like this just a touch-up is needed, no need to repaint the entire wall (depends on the color and paint used).